Showing posts with label DnD. Show all posts

Sunday, July 26, 2015

More Neverwinter Nights 2 modding

One should not take my lack of updates here as a sign that I'm not gaming.  The truth is, I play other types of games as well as RPGs, and I'm not sure that they'd fit well on this blog.  After finishing the module that occupied much of my time over the past couple of years, I expanded back out into a wider variety of game types, and played many other games to completion, though I did also find the time last year to add a Halloween expansion to my campaign.  At any rate, the itch to play and mod Neverwinter Nights 2 has returned.

I've played many modules recently too, of course, and I've even written reviews of them, but I'm not comfortable with posting those reviews.  As a reader may note from my previous reviews (including of NWN2 modules), I can be a harsh critic, and I have rather high standards.  Those standards have only risen higher since those last reviews, since I've not only played a good number of exemplary modules, but I've also seen for myself exactly what can be done in the toolset.  I want my criticism to be constructive, but it's hard to disguise the frustration I sometimes feel at certain common mistakes that cause problems in modules, especially when they're reported to the author and are never fixed.  So as yet I've remained silent.

I've started on another expansion to my campaign, but it's very preliminary work so far.  I've made some new custom content.  One is a recreation of the green devil head, the iconic trap in the classic Gary Gygax module Tomb of Horrors.  This has no real use outside of that module, and I'd hate to see such an iconic trap being used for generic decoration, so the only point to creating this was to test out a sculpting method in Gmax, which was cutting shapes out of a plane and moving vertices around.  It worked very nicely, so I can see myself making more interesting objects now.

Another is a new shiny tintable floor, which was inspired by a description of the evil cleric's room in the classic pen & paper module The Keep on the Borderlands.  Most NWN2 assets suffer from poor texturing.  Low resolution diffuse maps, overwrought normal maps, and very little specularity.  My content is intended to make up for that.

Another is a set of tile floors based on the dungeon floor tiles in the official Wizards of the Coast map tile packs.  These are also shiny and tintable in several ways (you can tint them in ways that make them appear less shiny, and can optionally tint them in a checkerboard pattern).  The scale is not the same as the original official map tiles, however.  The original dungeon tiles were a single tile to represent 10 feet, aligning it with one of the standard measurements (the other is 5 feet).  However, since NWN2 tiles are 9 m to a side, I decided to have 12 tile squares per 9 m, which makes each square approximately 2.5 feet.  This means that a set of 4 tiles creates a 5 ft x 5 ft square, or 8 of them makes 10 ft x 10 ft.  This makes it easy to map out interiors based on the old D&D maps.

Although I have some ideas in mind for my expansion already, I've decided to go through some old Dungeon magazines for inspiration and details, especially for special encounters, traps, treasures, etc.  Each room is a set-piece in many of these older adventures, each containing something new to see or do.  This sort of design goal fits in well with one of my other design goals, that of spectacle and discovery.  Then again, there are also some adventures that contain plain empty rooms.  I'm not particularly concerned with this kind of realism.  I want the rooms to have things in them that are interesting for players to do in a game, whether or not it's more realistic to have empty, looted rooms in a place that's supposedly occupied, or to have traps and puzzles in each room, or just to have rooms piled high with junk or objects too large for an adventurer to move.  Likewise, in a world where everburning torches are a common enough item, there's no real need to play the "realism" card in terms of lighting.

Anyway, here's to more fun times ahead.

Sunday, October 14, 2012

The Temple of Elemental Evil

The Temple of Elemental Evil is one of the first games I bought from GOG back in 2010, and my initial attempt at playing it determined that I was not yet ready for such an excellent, hardcore game. 

I found this game extremely confusing when I first tried to play it about 2 years ago.  First of all, I was more or less unfamiliar with the D&D 3.x ruleset.  In the intervening time, I've played both Neverwinter Nights games and pen and paper Pathfinder, so now I have a much better idea of what I'm doing.

Another stumbling block was that I had no idea where I should go or what I should do first.  I made the mistake of heading straight for the moat house after delivering news to the head priest at the local temple, since it seemed like that's where I was supposed to go next.  When the head priest told me about this moat house quest, the dialogue included an option to head out to the moat house immediately, and so naturally I thought that it would be designed for a level 1 party.

In this first attempt, on the way to the moat house, my party was ambushed by two giant frogs.  Aside from the opening vignette, this was my first taste of combat in ToEE.  I did my best with the unfamiliar controls and the inadequate gear, but things clearly weren't going well, and I knew we were doomed when I saw two more giant frogs join the fray.  I couldn't do anything but watch helplessly as, one by one, the whole party was grappled by the tongues of the giant frogs and then swallowed.  TPK.

Let me tell you, this party was in no position to be going to the moat house.  After trying a few in-town quests instead, I learned just how pathetic and vulnerable we were.  There's a quest to find out who's poisoning a farmer's sheep.  I found the person doing it (he was just standing around out there for hours all night, so it wasn't hard), but I couldn't get any information out of him, so I tried pickpocketing him to see if I could get some evidence that way.  Apparently that doesn't work at all, because I was successful multiple times, but never found anything new in my inventory, but when he spotted me and entered combat, this somehow aggroed the sheep on the farm, and they attacked.  My party was then wiped by sheep.

I checked online for some advice on where to begin, and a couple of places recommended going to Deklo Grove (which required finding someone in town to give me the quest, which I don't think I ever would have found) and just grinding on random spawns there until level 2.  Not very fun.  I did get to level 2 that way, but it took a while.  When I did, I ended up taking the Toughness feat on several of my characters, which in retrospect was an unwise choice.  It grants you a meagre 3 extra hit points, which seemed like a lot at the time, when the health of all of us could be measured in single digits, but after just a few more levels, 3 HP is rather insignificant, as I discovered when I hit level 2, and saw my HP nearly double!  Really, when I made this first attempt about 2 years ago, I didn't even understand that each level added another die's worth of HP.

Anyway, I checked the Circle of Eight site, and saw that they had released a new version of their mod since I last checked.  It wasn't compatible with the previous one, but it had some new content that I wanted, so I had to start over.  But maybe that wasn't so unfortunate, because with my new understanding of the D&D rules, I could now understand that some of the pregenerated characters I was using were not very well suited to their roles.  For instance, I had a wizard whose intelligence was rather average, but who had very high dexterity, which wasn't doing her any good.  I had just assumed that the pregenerated characters that came with the game would have been ideal characters, but now I believe they were made with intentionally random ability scores, just to make it that much more hardcore.

So I started again with a new party of six members (the mod pack allows party sizes up to 7), some of whom were custom made, to use in the Co8 mod pack version 7.0, which includes several new areas, including one designed for level 1 characters.  Perfect!  I went through the process of obtaining the quest, which was rather verbose but well-written, and ironically played up as something extremely dangerous, when it was in fact the most level-appropriate thing I could be doing, unless you count the social quests in town.  When I got to the new place, Welkwood Bog, the first creatures I encountered were...kobolds!  Whew!  After giant frogs and giant spiders, I found the kobolds quite reassuring.

The Welkwood quest was fairly short, but gave my party a much-needed level increase and gave me some spell scrolls and some better starting gear.  It had an interesting story behind it, too.  Ordinarily I like social quests, but I think the awkward interface in this game, as well as the dull, low-saturation art design contributes to the lack of fun in that regard.  I was happy to take this alternate route.

Interface and game information

The Temple of Elemental Evil has the most detailed, in-depth set of options for a player's actions in any computer RPG I've ever seen.  Stances, grappling, trips, attacks of opportunity and more!  Unfortunately, these are arranged inside a horrible radial menu with layers within layers of flyout "spokes".  Remember me complaining about the inscrutable icons in the NWN radial menu, and how I wished for a simple text menu?  This has text, but it rotates it to match the angle of the item on the menu, making it unnecessarily awkward.  Please, please, give me my spells in a nice simple list where I can get to them without having to delve through multiple levels of flyouts on a radial menu!  I liked the way NWN2 did this, with all of my spells available at a glance, with descriptions, grouped by spell level, with the touch of a single key.  I did eventually get used to the interface, but I would never call it a "good design", and I really wish I could change it.

One thing that partially mitigates the awkwardness of the radial menu is the ability to assign shortcut keys to individual commands (for instance, I assigned keys for Coup de Grace, 5-foot Step, and Charge Attack), though many of the keys I wanted to use were reserved.

The font they chose for all of the in-game text is a boldfaced sans-serif font like Helvetica or Arial, and is rather small.  Sans-serif is not as readable at small sizes as serif fonts, because the serifs aid the eye in interpreting the letters.  (Likewise, mixed-case is easier to read than all-caps, due to the relative distinctiveness of the letterforms, but fortunately this game used mixed-case.)  The font cannot be changed, nor increased in size -- at least not easily.  I saw a hack out there somewhere that was supposed to increase it, but I think it said I'd have to start the game over again, and I wasn't ready for that.  Instead, I settled on playing at a lower resolution than I prefer, since the text doesn't scale.  This means poor-quality screenshots, I'm afraid.

The game contains a wealth of information on game rules, rolls and modifiers, and what things do.  If you open the combat log, it describes the actions of each turn, with highlighted words that can be clicked on for more detail.  There, you can see exactly what number you rolled for your attack/save, what items, effects, or feats may be modifying that roll and by how much, and what number you had to beat in order to succeed.

I used this information screen in one of the few instances I've come across where picking a lock was necessary: in this case it was a chest added by the Circle of 8 mod.  Of course, my wizard knows the Knock spell, but this chest turned out to be spell resistant.  I no longer had a rogue in my party, and my ranger wasn't able to pick a lock even though she had some points in the open lock skill.  (Due to the level caps on skill point distribution, I sometimes had extra points left over, and spent them on cross-class skills.)  So I temporarily hired Furnok, a rogue NPC staying at the nearby tavern, and had him try to pick the lock.  He failed several times, so I checked the log, and saw that even though it was awarding him rolls of 20 (the maximum), the modifiers weren't high enough for him ever to succeed.  So I lent him the Gloves of Dexterity I had crafted, which I saw added a little to his modifiers, but still not enough.  I had my druid cast Cat's Grace on him, and tried again.  Almost there, but 1 point shy!  Finally, I had one of my clerics cast Prayer on the party, which added 1 more point, and he was then able to pick the lock. 

By comparison, Neverwinter Nights 2 shows the rolls right in the main window, and tells you if success is possible, but doesn't break down exactly where your modifiers are coming from like ToEE does.

Similar to these skill check reports, you can also get a detailed breakdown of your character's attack bonus or armour bonus, which is immensely helpful in intelligently building and outfitting a character, so that you know which feats, enhancements, and other bonuses are in effect, and which don't stack, and why.

Other aspects of the game and interface are quite unhelpful by comparison.  There are signs outside the buildings, but they're just decoration, and aren't readable like in other games, where you might hover the mouse over them to see what they are.  At least the map screen allows you to place notes on it.  Also, there's a key to highlight usable objects on screen like in Baldur's Gate, but most of the time it doesn't highlight anything!  I couldn't find anything highlighted in Hommlet, and only a few things (dead bodies with loot and doors) highlighted in one of the interiors.  The quest journal is also extremely terse and lacking in detail, and it doesn't change to reflect new information, so you may need to take your own notes.

Spell descriptions are likewise laconic, including none of the flavour text from the sourcebooks which the other D&D CRPGs included.  They also occasionally omit very relevant information.  For instance, near the end of the game, I had been using the Raise Dead spell several times, but at some point it told me that I couldn't use it, because I didn't have enough gold.  I checked, and sure enough, it had drained my party funds dry!  I checked the spell description again, and it said nothing about costing gold to cast it, whereas other spells like stoneskin and identify did mention that.  I checked the manual, and in the manual it mentions that Raise Dead requires 5000 gp's worth of diamonds as material components.  That's something that it really should have mentioned in the game itself.  I shouldn't have to consult the manual before casting a spell to see if it has requirements not listed in the game itself.

This is not a complaint about the spell being expensive, though.  I really like that some spells, especially powerful ones like this, require expensive material components.  It raises the stakes in fights, unlike in other D&D-based games, where raising the dead is free or even automatic.  The only complaint is that I wasn't warned about the expense in-game.

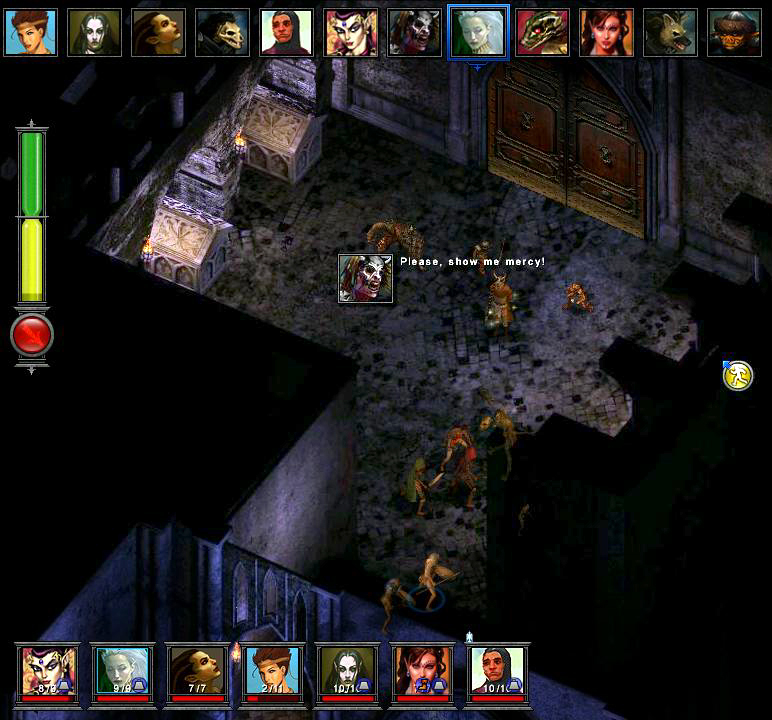
Other nice inclusions are such things as a druid's Reincarnation spell being mentioned as not being guaranteed to bring the character back as their original race, and the fact that paladins can fall from grace due to their actions.  Fallen paladins must seek atonement, which is prohibitively expensive to discourage casual out-of-character behaviour.  However, my paladin fell from grace unexpectedly when I spared the drow priest when he begged for mercy, and accepted his offer to escort me to a back entrance of the Temple of Elemental Evil.  It was not adequately telegraphed that this would entail the chaotic evil drow joining my party.  My solution was to kick the paladin out of the party and roll up a dwarven fighter.

Also nice is the inclusion of nonlethal damage in addition to the normal sort.  Things like fistfights and drinking contests involve nonlethal damage on a separate health bar.  When your nonlethal hit points run out, you fall unconscious.  This provides an alternate way of dealing with trolls, incidentally, who can normally only be hurt with fire or acid damage.  Everything else deals nonlethal damage for them, but the interesting thing is that once they fall unconscious, you can choose a coup de grace attack which kills them instantly.

I also appreciated the pop-up boxes of DM-text that appear when you enter significant new areas, describing the area to set the mood, much as a dungeon master would do in a pen & paper game.

The crafting menu has its pros and cons.  On the pro side, it gives you a full list of crafting recipes, and shows you what is required to craft them, such as level, spell, items, gold, and XP cost for Craft Wondrous Items.  You can easily add effects to items with Craft Magic Arms and Armour, and rename your items.  On the minus side, it's sometimes unclear why some of the effects can't be added (it doesn't tell you which condition isn't met), and many of the wondrous items are missing descriptions, or have inadequate descriptions, so I can't tell what they're supposed to do!  The game manual is excellent and extensive, but doesn't include descriptions of these wondrous items either.  I have to look them up in the online d20 System Reference Document to find out.

Speaking of recipes, this is the second Troika game I've seen that includes an actual food recipe in the manual, at the end.  Arcanum has "Grandma Cookhill's Three Bowl Bread", a halfling's banana bread.  This one has a recipe for "Chocolate Chip Cookies of the Gods", whose description indicates it also probably came from a halfling, though it was stolen by an orc.  I especially like the bit where it stresses the importance of waiting for the dough to chill thoroughly, saying "If you cannot wait, do not expect cookies of the gods."

Bugs

I've heard that the game was very buggy when it was released, as per usual for a Troika game.  The Circle of 8 mod pack appears to have fixed most of those bugs, and provided workarounds for most of the few that remained.  I only encountered three, myself.

One was when one of my characters walked across the Spike Growth I had cast, and acquired it as a permanent effect.  Even after resting more than 24 hours and performing heals on her, she still had the debuff, and the timer countdown never changed.  Periodically she would get hit as if she were still walking across the spikes.  I found this addressed in the Co8 guide, which said to go to the druid Jaroo in Hommlet, and ask to be healed of permanent spell effects.  This fixed the problem.

Another bug was inside the moathouse dungeon.  When fighting the big crowd of fighters, I ran into a game-breaking problem where there were two foes that didn't seem to actually exist, but they were in the queue for combat turns.  The game paused for a while when reaching one of them, and moved on to the next one, but it just never recovered from the second one, leaving me stuck in combat forever.  I tried fixing it with some console commands, which seemed like it might help at first, but just led to more problems.  I reloaded to a save before fighting the group, and tried again, and this time there was no trouble.

Lastly, there was a game-breaking bug on exiting the Welcome Wench tavern in South Hommlet, in which the party (and all NPCs) would be frozen once we got outside.  Effects like smoke from chimneys still functioned, and I could toggle in and out of combat, but none of us could move.  This bug occured twice from that saved game (when I did the same thing both times).  I evaded it somehow when I instead did a tavern brawl quest and then rested some more before leaving the tavern.  The Co8 guide says that freezes like this become more common in South Hommlet as the game progresses, and that players should avoid that area when possible.  I got through the rest of the game without any more such freezes, though, although there were other, unrelated freezes that were fortunately temporary in some places.

Storm of Zehir inspiration

I noticed that there were some elements in this game that I also noticed in the later-released Storm of Zehir, the NWN2 expansion.  One was the use of the Survival skill allowing the party to detect and avoid random encounters on the overland map.

Sometimes there were friendly encounters, such as when I encountered messengers who wanted to reward me for rescuing some of the people I found in the titular Temple of Elemental Evil, and sometimes there were encounters which were ambiguous.  One of them listed the encounter participants as "a party of adventurers", with their names and portraits in the list, so I was curious enough to hail them.  Sure enough, it was just a party of adventurers like mine, who at first mistook us for "another bandit encounter", to comedic effect.

There were some others like that, and it's nice when a game that includes random encounters takes the care to make them diverse, and not all about combat.

Speaking of which, it was interesting how sociable the denizens of the temple were.  Although the majority of monsters attacked us on sight, there was a significant number of characters who were willing to negotiate, join up with me, or allow to join up with their factions.  Some even offered quests!  There were numerous factions within the temple, working against each other even as they seemed to be working toward a common goal.

End game

The game got much, much easier as I gained levels and added enchantments to my weapons and armour with crafting.  I noticed that my dwarven fighter tended to score a lot more hits than my human barbarian, who missed against higher level enemies much more frequently, despite having near-identical enchantments and appropriate weapon focuses.  Encounters were almost always of the "tank & spank" variety, except that in this case, this tank was also the one dishing out the most damage.

There were two really tough fights, though.  Well, only one was really tough (others, like the group of beholder-kin on the ice plane and the group of fireball-flinging noble salamanders on the fire plane were tough, but not really tough), and that was the Balor on the fire plane (the D&D equivalent of the Balrog from LotR).  I had to retry that fight maybe 10 times, and most of the fights ended with the Balor having taken no damage at all.  By contrast, Zuggtmoy was only average!

I even sought tips online for beating the Balor, but they mostly didn't work with the Co8 mod.  Several posts recommended using Cloudkill against him, but when I tried it, it said "Target is immune!" so I guess the Co8 team figured the Balor wasn't hard enough.

Summoning the bosses from the other elemental nodes didn't seem to help either, aside from providing more targets to distract the boss.  More often than not, these summons cast AoE effects that resulted in friendly fire, dispelling my buffs, sickening my fighters, causing my party members to flee in terror, etc.

The fear was the biggest problem.  I read that "circle of protection against evil" is supposed to make party members immune to fear, but it didn't.  They were all within the protective circle, and they all ran away.  I had a bit better luck with the individual (non-circle) "protection from evil" spell, though, and I think that was instrumental to my eventual victory.  My fighter resisted fear the entire time, though my barbarian succumbed a couple of times, and had a problem with missing the enemy.  Regardless, the rest of my party (who were mostly useless against the Balor except to help cast buffs) dealt with the trash spawns while my dwarven fighter steadily whittled down the Balor's HP until finally, finally, it was dead.  After that, I went to face Zuggtmoy.

As stated, Zuggtmoy was much easier than the Balor, though I thought the rendering of her character was beautiful, as was the surrounding area of the lower temple.  Again, it was mainly my fighter who beat her up, while the others dealt with buffs and summons (and fear).  Great Cleave and weapons of Mighty Cleaving were a great help against these spawns.  Hasted, my fighter dealt four attacks each turn, at around 25 HP each, when she didn't miss.

Zuggy interrupted the fight at some point to try to make a deal, and I took my time in answering, but while I was considering it, I was surprised when one of the spawns started moving again, and the dialogue box disappeared before I had a chance to choose anything!  I wasn't going to make any deal, but I still wanted to see what she had to say about it.

This level of the temple has many rooms, but is empty except for one room of mushrooms.  Word has it that Troika ran out of time and couldn't put any of the encounters in that location that they had planned.  I haven't seen the original P&P module, so I don't know what was supposed to be there.  I'm surprised the Co8 pack didn't put anything in there.

Co8 does hold off the game from ending with the death of Zuggtmoy, so that you can go on to play some higher-level content in a new town.  I haven't done that yet, but I will eventually.  To end the game with the Co8 mod, you have to choose it specifically from the dialogue of Brother Smyth, so I went and did that to see the ending slides that I would have seen after killing Zuggtmoy originally.  The ending slides were better done than the ones in the NWN2 OC -- I can say that much.

Conclusion

The game is intimidating to a new player, and very tough and unforgiving at low levels.  It also includes many pre-generated characters with poorly-assigned ability scores for their classes, which can cripple a player unfamiliar with the rules.  Its art design is adequate, but bland, at least until you get to the Temple, and also very dark, requiring me to turn up the gamma to see.  It could have been improved with a larger number of interesting characters and interactions, because the ones that were there were quite fun.

Despite this, once I got through the first few levels, I found it to be an extremely fun game with rewarding challenges, plenty of quests, and a variety of environment styles.  Once I started playing it, I didn't play any other games until I finished it.  I think it's the best turn-based RPG engine available, despite the non-optimal interface.

Extra screenshot gallery

Tuesday, June 5, 2012

New NWN2 module underway

I've officially begun work on the module I've been planning. I'm calling it The Black Scourge of Candle Cove, and I'm discussing my progress on it in threads on the NW Nexus and the Bioware Social Network.

Saturday, June 2, 2012

Neverwinter Nights 2, part 6 (ending)

Aside from some new upgrades being available to build at the keep, and some new keep-related resources to collect, the order of the day in Act 3 is to gather some potential allies for the upcoming fight against the King of Shadows (I agree with the Luskan ambassador in regard to the silliness of the name). Basically, that means that Crossroad Keep has become a new quest hub, with the world map now being restricted to locations that relate directly to this purpose. All except for the town of Ember, which has no one new to recruit. I went down the well to see if I could gain the friendly goblins as allies, but there was no new dialogue with them. There were also some characters available to recruit to work at Crossroad Keep, which don't seem to be directly related to the upcoming battle, like a dancer for the tavern and a couple of extra merchants.

The other locations (with one notable exception) were pretty small and self-contained, not like the similar ally-gaining quests in Dragon Age: origins, which had very large diversions for each one. In at least one case (Highcliff), it seemed like they might have planned them to be larger originally, because they involved some boss-level fights with groups, phases, and adds, but these were all located right there, without having to crawl through a dungeon to reach them.

The simplest of these was also the hardest. I had to fight a character named Light of Heavens in a one-on-one duel. Again, me as an unarmoured spellcaster, and her as an armoured sword-swinger with knockdowns, high hit points, and lots of spell resistance. Once again, with this fight, the devs show their disregard for clothies by requiring it to be a solo effort. This was a slightly laggy location, with dozens of citizens spawning from houses and evacuating the city, but not enough to interfere with the gameplay. It took several tries, but I finally beat her with the use of about 10 summoned creatures (in a series, since I could only have one at a time), 2 or 3 blast globes, just about all my spells, and lots of running around the marketplace in a big circle to gain enough distance to cast spells at her, since my speed was just slightly higher than hers. The process was basically starting with a summon, running away until it got her attention, then casting spells at her until she killed it (which didn't take long), then running away far enough to summon another creature before she reached me, then running some more until it got her attention, and so on.

The one in Highcliff where I had to fight a lizardman shaman king was a much better fight, and much more fun, but it was, again, right there in town.

The druid circle one involved two of the companions, Elanee and Bishop, which gave it more character, but I don't see why it needed Bishop there at all. He was a forced companion when I went to that area, but didn't seem to do or say anything that made his presence mandatory. This was a minor annoyance since I had stripped him of all his gear when I left him behind at the first opportunity, and when he showed up I didn't have any armour on hand that he could wear. I never gave back his dagger, either, because I have Neeshka using it. The only reason I can speculate that Bishop might have been required, since he didn't contribute any unique action, and his commentary was inconsequential, is that perhaps his having witnessed the events there might play a part in a later development. There was some conversation back at the Keep from an earlier plot development when Bishop made some comment about what "we" went through, even though he hadn't been in the party at that time. I don't trust this chaotic evil ranger, and I don't like the fact that he's making his home in my keep, away from the watchful eye of Duncan back at the Sunken Flagon.

The Alliance with the Wendersnaven bit finally addressed the bard issue I had mentioned earlier. Finally, I got a bard instrument (the only one in the game?) that actually boosted bard skills rather than yet another equippable item that does nothing but cast some low-level spells when activated. Finally, a gameplay reason for my bard to carry an instrument!

There was an encounter with the ghost of a dragon in a location revealed to me by Ammon Jerro, which was plot-related, but separate from the "recruitment" theme of the rest of them. The dragon had information about how to reforge the silver shards into the sword we needed to kill the King of Shadows (why it would work this time, when it didn't work the first time, is unclear.) Apparently, Ammon had spoken to this ghost several decades ago when he was researching where to find a weapon to fight the King of Shadows in the first place.

The dragon's ghost was chained to this area due to a giant floating crystal dragon heart being physically chained up in this location, guarded by a couple of smaller dragons. By the ghost's request, I fought those guardians and destroyed the heart to release the spirit. This led me to yet another return to West Harbour, and at least this time one of the companions expressed a little emotion over what happened there. Grobnar did, too.

The best quest in Act 3

The recruiting of the Ironfist clan was the most developed of this section. It's almost out of place compared to the other ones, but you won't hear me advocate scaling it back to match the others. This one had much more companion involvement, and its task actually took place in multiple locations, and brought back events from way back in the storyline, involving an artifact-level pair of gauntlets that we had found at that time, the Gloves of Ironfist.

But talking with other voiced members of Khelgar's clan made me notice that Khelgar's the only one of his clan with that "Scottish" accent! I seriously can't understand how production companies keep doing this sort of thing. It's like Deanna Troi being the only Betazoid with her accent (her mother doesn't have it, and her father was apparently American), or Ambassador Delenn being the only Minbari with hers, or Londo Mollari being the only Centauri with his. Khelgar might have been a required companion for this section (if not, he should have been), but I can't tell because he was already in my party, reclaiming his role as the party tank after the death of Shandra.

To gain the support of the dwarves, we had to prove to the clan that Khelgar was a member in good standing, and not an outsider who had deserted them. To do this, we had to recover the second of the clan's patriarch's artifacts: The Belt of Ironfist. With that and the matching gloves, Khelgar would have the augmented strength necessary to lift the Hammer of Ironfist, once wielded by King Loudram, in a kind of sword-in-the-stone test of worthiness.

The belt was in the possession of some fire giants, so it was off to Mount Galardrym to find them.

Mount Galardrym was the biggest outdoor area I've seen in the game, if I'm not mistaken, and it was the absolutely best designed area. The long, winding paths leading up the mountain, overlooking lava pits, were clearly crafted with love and care. There were numerous watchtowers with trapped approaches, guarded by groups of fire giants and hell hounds who were fun to fight (though perhaps too easy for giants). There were several points of interest and several separate destinations to reach. One spot offered a scouting overlook to any surviving giants that our party may have missed by taking alternate paths, and offered an opportunity to push some large rocks down onto their heads as a surprise attack.

But the highlights of this area, aside from its aesthetics, were the two boss battles, one at the end of each path. One led to a big red dragon, and the other to the powerful fire giant king with his retinue of more giants and hell hounds than I had battled on the way up. Each of these bosses wanted the other one dead, as it happened, but I was not inclined to make any deals with either of them, so I fought each of them in turn. First the dragon, and then the giants.

The dragon fight was very challenging, and a lot of fun. My party was wiped on the first try. On the second try, I memorised a whole different set of spells in preparation, buffed nearly the whole party for immunity to fire damage (as many as I could with the spell slots available), and made sure all my offensive spells had significant damage even if save rolls were made. It was a brilliant light show! I've never had such an enjoyable dragon battle in any game before!

Contents of one of the chests showingAt the end of it, adding to the satisfaction of defeating a worthy opponent, the dragon's treasure hoard waited as a tantalising bonus. A huge pile of gold, and trapped chests filled with high-end gems, scrolls, and enchanted gear. This blew away the most recent other dragon battle I experienced, which was in Dragon Age: Origins (the dragon in the Brecilian Forest ruin, not the Archdemon). The fight there was less fun, and the hoard was much smaller. Here, I actually got to send my staff to haul the piles of gold back to my treasury! My standards had been lowered so far from previous games, I really wasn't expecting to be able to do that.

After I'd finished savouring my victory, I went around the mountain to the other side to face the fire giant king, which was another pretty good fight, but an anticlimax in comparison.

After gaining the Ironfist alliance, there were a few outdoor battles with the King of Shadows' forces, including a rather funny bit where we found part of his vampire army sleeping in their coffins during the day. Breaking the coffins open resulted in a crowd of vampires running around shrieking in the burning sun!

Ammon Jerro's remorse

I came to like the character of Ammon Jerro over the course of the game, despite the ruthlessness of his actions -- especially where it was completely gratuitous. Now, some of his murders were for revenge, though I don't recall if he explained what exactly their offenses had been against him. Other murders, however, were wanton and unnecessary, like the employees at the Moonstone Mask. While it turned out that he was motivated by the goal of recovering the shards to fight the King of Shadows and prevent a larger number of deaths, and considered some innocent casualties along the way to be acceptable losses, in some of these cases he could have just gotten what he came for and gotten out, without killing the people who were not fighters, and who were incapable of actually preventing him from getting the shards.

Spoiler: Click to display/hide

This hidden spoiler block contains spoilers about the death of a particular character

Solution to a major plot bug

There was a game-breaking bug in the battle at Crossroad Keep, after the siege tower battle, when Black Garius showed up and was giving his speech about how he was about to crush us by summoning an avatar of the King of Shadows, but it was actually pretty funny when it happened. In the middle of his speech, he apparently wandered a little too close to one of the soldiers, who sucker-punched him. This cut off his speech and he started fighting the soldiers, and never got around to summoning the avatar. Unfortunately, he was also plot-immortal at this time, so the game couldn't continue.

The solution is to open up the console and type:

rs 3541_death_nwalker

This loads up the cutscene that should play after you kill the King of Shadows' avatar, and the plot can continue from there. You will miss out on actually getting to participate in that fight, however.

I was also proven right not to have trusted Bishop in this section, since he was the one who just unlocked the gate to let the enemy in after the siege battle.

The ending

The ending was quite the mixed bag, but I'm inclined to forgive the visible signs of the time/money running out. There were subtle signs before, throughout the campaign, such as the design of Highcliff (the "tavern" bit I mentioned in a previous post), some conversations with companions that never went anywhere, and the large difference in scale between the various alliance-gathering missions, but the first really obvious sign I noticed was when I was looking to see what there was to do in the merchant district in Neverwinter during the evacuation. There was a dead man near an outhouse named "Privy Man", who had a mysterious journal on him that described some fearsome beast under the outhouse. I looked around, but found nothing else to do with him, and when I looked for answers online, I learned that it was the remnant of some cut content -- the Archmage Startear would have sent you on a quest to kill a lich who lived under that outhouse.

Nevertheless, whatever else they cut, Obsidian at least made sure to deal with all of the named adversaries introduced throughout the campaign.

Things really started showing the time/budget strain when what I thought was going to be another major battle turned out to be me watching a slide show of retouched screenshots, with voice acting, of Lord Nasher leading his troops to battle, and then a major event in the battle, and its outcome. Surely this was originally at least meant to be a cinematic, if not something in which the player was meant to participate!

Then there was the ending scene itself, which came after the final dungeon. After defeating the King of Shadows (it shouldn't be a spoiler to know that such a thing is possible), I was treated to another very unsatisfying slideshow of retouched screenshots describing the immediate aftermath of the battle (more on that in a second), narrated by a clearly non-professional voice actor (who someone on Youtube described as "Norman, from Accounts"), which then went on to describe what happened with various people and places in the next few years.

What happened directly after beating the boss, I was told by the narrator, was that my whole party was wiped out by the collapsing lair, because the King of Shadows was a "load-bearing boss". In other words: Rocks fall, everyone dies. I was incredulous. I couldn't believe that's how they ended it. And that was the good ending!

I spent the next few hours reading other people's reviews of that ending, as well as watching the "evil" ending on Youtube. Interestingly, while looking around on Youtube, I found that dialogue of my companions had actually been recorded to act out what I was only told had happened, and Youtube user RandonB put them together and posted the dialogue. I think that version of the ending would have been much better than the poorly narrated version, even if they had done it with the slide show method they had previously used for Lord Nasher's battle. It would have certainly been more poignant, as opposed to the whole "Then, offscreen, this happened. But never mind that -- here's what happened elsewhere over the next few years." Doing it the way they did, it actually reminded me a bit of Harry Potter and the Deathly Hollows (the final book in the series) in how the epilogue chose to answer questions that no one had even been asking, while keeping mute on issues of actual interest and relevance.

But aside from the actual ending, I enjoyed the climax very much. First was the showdown with Black Garius, and his attempts to seduce the members of my party to join his side, one by one. I actually went through this scene twice, because I wiped on the first attempt. The first time, he succeeded with Sand and Bishop (though Bishop had defected to his side earlier than in this scene), but the second time, he succeeded only with Sand. Although my influence with Bishop was predictably very low or nonexistent, considering I never included him in the party and didn't like him, and I hadn't said anything to try to convince him not to fight us, for some reason he decided to abandon both sides the second time through.

Neeshka was able to resist Garius' demon-binding on her through the power of friendship, since I liked her a lot and had a very high influence with her. I had high influence with everyone, really, except for Sand, who I neglected as much as Bishop, and much for the same reasons. So, with Khelgar, Neeshka, Grobnar, the Construct, Elanee, Qara, Casavir, Ammon Jerro, and Zhjaeve, we beat the stuffing out of Black Garius, at last, in a long battle with barriers, multiple add spawns, and several full heals on Garius' part. The rod of resurrection I was given earlier saw numerous uses during this fight. This battle also incidentally showed that it's possible to have a party of 10 fully-controllable characters, and that the previous party number limit had not been hard-coded.

After that mini-boss, it was time to face the King of Shadows himself, after a rest to heal and refresh our spells. It was nice of him to delay his passing through the portal until my party had rested from the Garius fight. This was a major fight, and with 10 party members, it resembled a raid boss. There were several phases to the fight, involving several strategies and objectives, and this made it particularly fun. It turned out that the Silver Sword of Gith was actually necessary after all to beat the KoS, but only because it was the only weapon that could damage the portal to the shadow weave, which is apparently the direct link KoS was relying on to stay alive (even though he had managed to forge a link to it out of nothing in years past, when he was dying, so it shouldn't have been any big deal for him to just make another one). Really, this whole climax was fantastic, right up until the slide show ending.

Obsidian bit off more than they could chew, but I prefer it that way. It was already a huge campaign with a massive amount of content, and I for one am glad that they aimed high, even if they ultimately had to abandon some of their plans.

And now that I've finally gotten the last part of this review posted, I can get started on my module.

Monday, April 23, 2012

Neverwinter Nights 2, part 5

My apprehension at keeping all of my blog posts in a single file was justified. One surprise error while saving caused the loss of a month's worth of blog writing, about half of which had not yet been posted. I'll need to find a more stable solution, but in the meantime I'm making more frequent backup saves. This is what I've reconstructed of the second-to-last post about the NWN2 original campaign.

Crossroad Keep

The game is much longer than I was expecting. After battling what seemed to be a major enemy at the ruins of Crossroad Keep, I found that as a reward for my service I had been given the keep and its lands as a fixer-upper project. So now, apparently, I'm a landed noble, with a personal army, administrators, and my own peasant farmers to work the land, if I understand correctly. It'll be a giant gold sink, considering all the repair work that needs to be done, so it's a good thing I haven't spent much on the higher-level gear I've been seeing at some merchants.

This keep is much better laid out than the stronghold I was given in Baldur's Gate 2. Even though it's very large, there are characters stationed at all the important spots who I can talk to and be teleported to any other area. Additionally, there's a lot more to do there, such as making decisions on local policy, forging alliances, and sending other characters out on quests instead of doing quests for other characters.

The basement has a storage shelf and all three crafting stations, so perhaps this is what I should use as storage, instead of keeping it all on Casavir.

The improvements to be made at the keep are split into two areas -- manpower and repair/expansion. After talking to each of the heads of those departments, I decided to start by expanding and fixing up the roads that pass by the keep, to attract more merchant caravans, and I also told the chief of staff to recruit more soldiers, so I can later train them and set them out to patrol those roads, which is another necessary step to attract more merchants.

Guyven of the Road was there, too, and he talked about maps and finding nooks and crannies, but he didn't have any details, so I assume that's for later development.

While I was in the area, I went back to West Harbour to drop off a tithe box I'd been asked to deliver there, and see what may have developed on the homefront in the meantime. Nothing had, apparently. People were still walking around injured, houses were still wrecked from when I left, and I could still hear sound effects of fighting and screaming, and house fires in some spots. I did manage to finally get this "Wizard's Arsenal" quest out of my log book, though. It was a quest from the beginning of the game, which I had successfully completed at the time, but which was inexplicably re-added to my quest journal shortly thereafter. It had been stuck in my journal ever since then, even though I had entered that house several times trying to trigger something to get rid of it. Entering the house again at this later time made it disappear again.

Also in West Harbour, I found that I could bring one of the local farmers to Crossroad Keep to get the farms productive again. I think this keep might be an opportunity to help out that miner I met back in Port Llast, as well, who was looking for work. In any case, it seems that the keep adds a significant management minigame to the overall game, and it's a welcome improvement over other games' strongholds.

Incidentally, Crossroad Keep uses one of the tilesets with the worst kind of overdone normal maps (see picture). The stonework in the interiors looks like it's been exposed to about 2000 years of harsh weather, or else the stonecutter's guild was working with extremely crude chisels. Seriously, some of the normal maps in this game look like they were trying way too hard to point out the realtime shadows of the engine by making everything rough and pitted to absurd extremes.

Ruins of Arvahn

We were directed toward these ruins as part of the main quest. Approaching them caused that "Wizard's Arsenal" quest to pop up in my log book again! I was just walking along, and suddenly "Ding! *scribble*" my journal was stuck again with the quest from the beginning of the game to scrounge for starter weapons back in my hometown.

This was a pretty lengthy area, where I had to find and activate 5 statues, though the design of the place was rather uninspired. The first statue was right in front of the first fork in the road, three more were in dungeons in this zone, and the last one had to be reached through a portal that only opened once the first four were activated.

This area contained several tribes or factions that could be befriended or eliminated. I chose to befriend the first tribe of orcs, who seemed reasonable enough, refused an offer of alliance with a small band of infiltrators inside a dungeon because they were arrogant and threatening, and fought the ogre mage inside, because he was also rather arrogant and attacked me even when I merely declined to kill the orc leader for him.

The dungeons were pretty fun, with their own themes and objectives, and story exposition. One of them, Riverguard Keep, involved a kind of collection quest to gather items to open a door that led to one of the statues.

The gem mines involved a little puzzle in herding certain ghosts past obstacles into a central room, where they could perform a ceremony that would summon another one of the statues. This was also the site of a pretty funny bug, in which I was in conversation with one of the ghosts, and during the conversation, someone detected a nearby trap. I was surprised to see Neeshka automatically walk over to it and disarm it while we were still talking, and in the process, she apparently caught the attention of some enemies. So while my character was still stuck talking to this ghost, I was hearing the sounds of battle from offscreen, and seeing what little glimpses I could see of it when the fighting overlapped the cutscene camera angle.

The Temple of Seasons presented a series of season-themed challenges, each in an appropriately decorated room, and once all of the challenges were beaten, the door to one of the statues was opened. That one was the quickest run of the lot.

After passing through the final portal, I was redirected to (and I'll hide this in a spoiler tag) West Harbour, my hometown.

Spoiler: Click to display/hide

This hidden spoiler block contains an event spoiler

In regard to that, surely the designers must have had some kind of plans for an emotional connection for this scene. Why else would they have sent me here? There's nothing for me to do here. The portal was supposed to send me to the nearby Merdelain, to that one building that couldn't be unlocked when I passed through that location earlier in the game.

Anyway, I passed through that place and came to the last of the statues, in that building. Alas (or happily, considering it means more gameplay), there is another complication, and the statue is destroyed. But the foe within tells me that someone else had just been here and had received the statue's blessing, so now I just have to find that person. I figured it would be Bevil, my childhood friend, who was mentioned as having been heading into Merdelain when I had previously been in West Harbour.

Haven

Next stop was Ammon Jerro's Haven. Ammon Jerro was Shandra's grandfather, who she remembers as a kindly wizard. This was confusing to me, since I already knew that the mystery warlock is in fact Ammon Jerro, though it might not have been mentioned in the game yet. Anyway, the door to the Haven was magically barred against everyone except relatives of Ammon Jerro, so of course Shandra was there to open the door for us.

But Shandra's ancestry wasn't everything we needed. We also had to pass a few trials before we could get in, and that involved going around the area outside the Haven to gather items and kill mobs. The area's design showed some notable improvements over many of the previous areas. There were points of interest at different levels of elevation, a refreshing change of texturing that made even this dry desert area look good, and the mob placement was nicely distributed as well. The encounters were rather simple, though, and it left me wishing there had been a little more to do in this area.

Once we got inside, we were treated to a series of encounters with some bound demons who were willing to negotiate with us if we'd agree to help them out with their workplace bickering, getting their petty revenges and such. Shandra had been separated from us, and it seemed fairly comical at the time that she kept teleporting around trying to find us, always leaving a place just before we got there.

It was pretty straightforward getting through this place, though I had to watch helplessly as Shandra did some unnecessary things with no way to intervene, and it all culminated in a boss fight with Ammon Jerro himself, and ultimately the worst, least-engaging death scene yet.

Afterward, I was given an opportunity to rest and swap any party members if needed at the tavern on the property of Crossroad Keep, before a suddenly rude Sir Nevalle showed up to insist I go to Castle Never right then, with a little threat that I shouldn't get too comfortable here at Crossroad Keep, because it could be taken away from me at any time. Bizarre behaviour, considering the reason for summoning me turned out to be that Lord Nasher wanted to grant me full knighthood. This marked the end of Act 2.

Act 3 interlude

Act 3 started with the most frustrating and irritating thing I can imagine. Yet again, a developer gets the asinine idea that it would be a wonderful gameplay mechanic to suddenly strip away all my companions and drop me into a horde of elite vampires and wraiths after a bloody long cutscene with many unskippable parts! Arrrrghhh! I'm a squishy caster, not a tank! Why do so many bloody games do this? Developers: I hate this, and I don't respect this kind of design decision! I'm playing NWN2 for its party-based gameplay. If I wanted to be playing a solo hack & slash, I'd be playing an Elder Scrolls game.

After numerous reloads, even after setting the difficulty to the easiest level just to get through this moronic meatgrinder section (which I've never had to do in this game yet), only to find more shadow priests, shadows, and elite vampires waiting for me when I went "down the hall" to look for a secret door Sir Nevalle told me to find. That's when I resolved to get through it by any means necessary, so I could get back to an enjoyable part of the game.

I have to guess that the "party roster" option from the player menu at the bottom left of the screen must have been added by one of the expansions, because I was able to use it here to re-add my companions to my party, even though the setup here expects me to be playing it solo. I used that to get past the monsters, and then stuck through the rest of it solo (just in case it might have interfered with game scripts if I had a party), and eventually I was returned to Crossroad Keep with a new set of quests ahead of me, and all my companions gathered around to greet me. What a relief!

I think one more post should finish the OC, but like I said, this game is really long. I've skipped over a lot of things, and barely touched on others. I'm impressed.


Dead Nasher, or just a knockdown?